

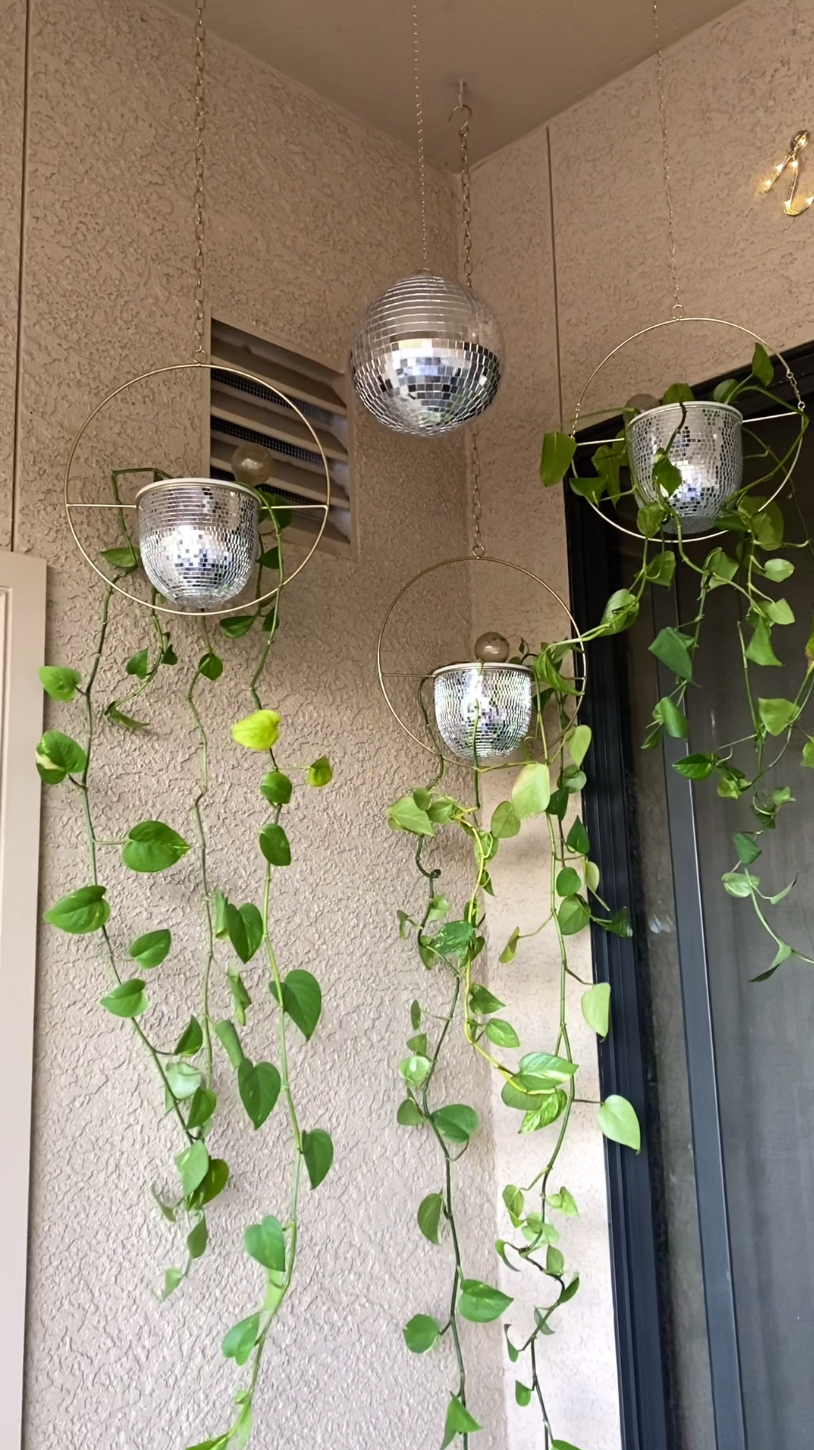
hanging planters
how to:

In the Millennial world, dogs are the new children and plants are now our pets. Plants are not only our companions (especially if you talk to them in lieu of journaling like I do most mornings), but they serve as beautiful decor while they purify the air around us. Sometimes it feels like we’re so isolated from nature. Sure we have windows and can SEE the outdoors, but when was the last time your bare feet felt the earth beneath your bare feet? The more wifi, bluetooth and wireless EVERYTHING we have now, the more I find myself filling my spaces with organic collections by the OG artist, Mother Earth. My coffee table is a live-edge olive tree slab, my small patio hosts a tiny herb garden, and lush plants and crystals fill every interior room. The older I get the more I’ve become a true collector of her work.
Whether you live in a cozy apartment or just have tall ceilings - adding hanging planters to your decor is a fantastic way to maximize all the vertical space in your home. They bring the eye upward, transform those blank walls, and can turn an empty corner into a mini green oasis.

Imagine walking into a room and being greeted by a mesmerizing sight of vibrant greenery cascading from above.  By suspending your plants, you're not only creating an eye-catching lush canopy but also bringing life and freshness to your space by optimizing their ability to absorb carbon dioxide and release oxygen. So, get ready to take in deep breaths of fresh, clean air while reveling in the beauty of your hanging green companions.

It's like stepping into your very own secret garden!
Who says plants have to be limited to the floor?
Step 1: Pick the Perfect Planter

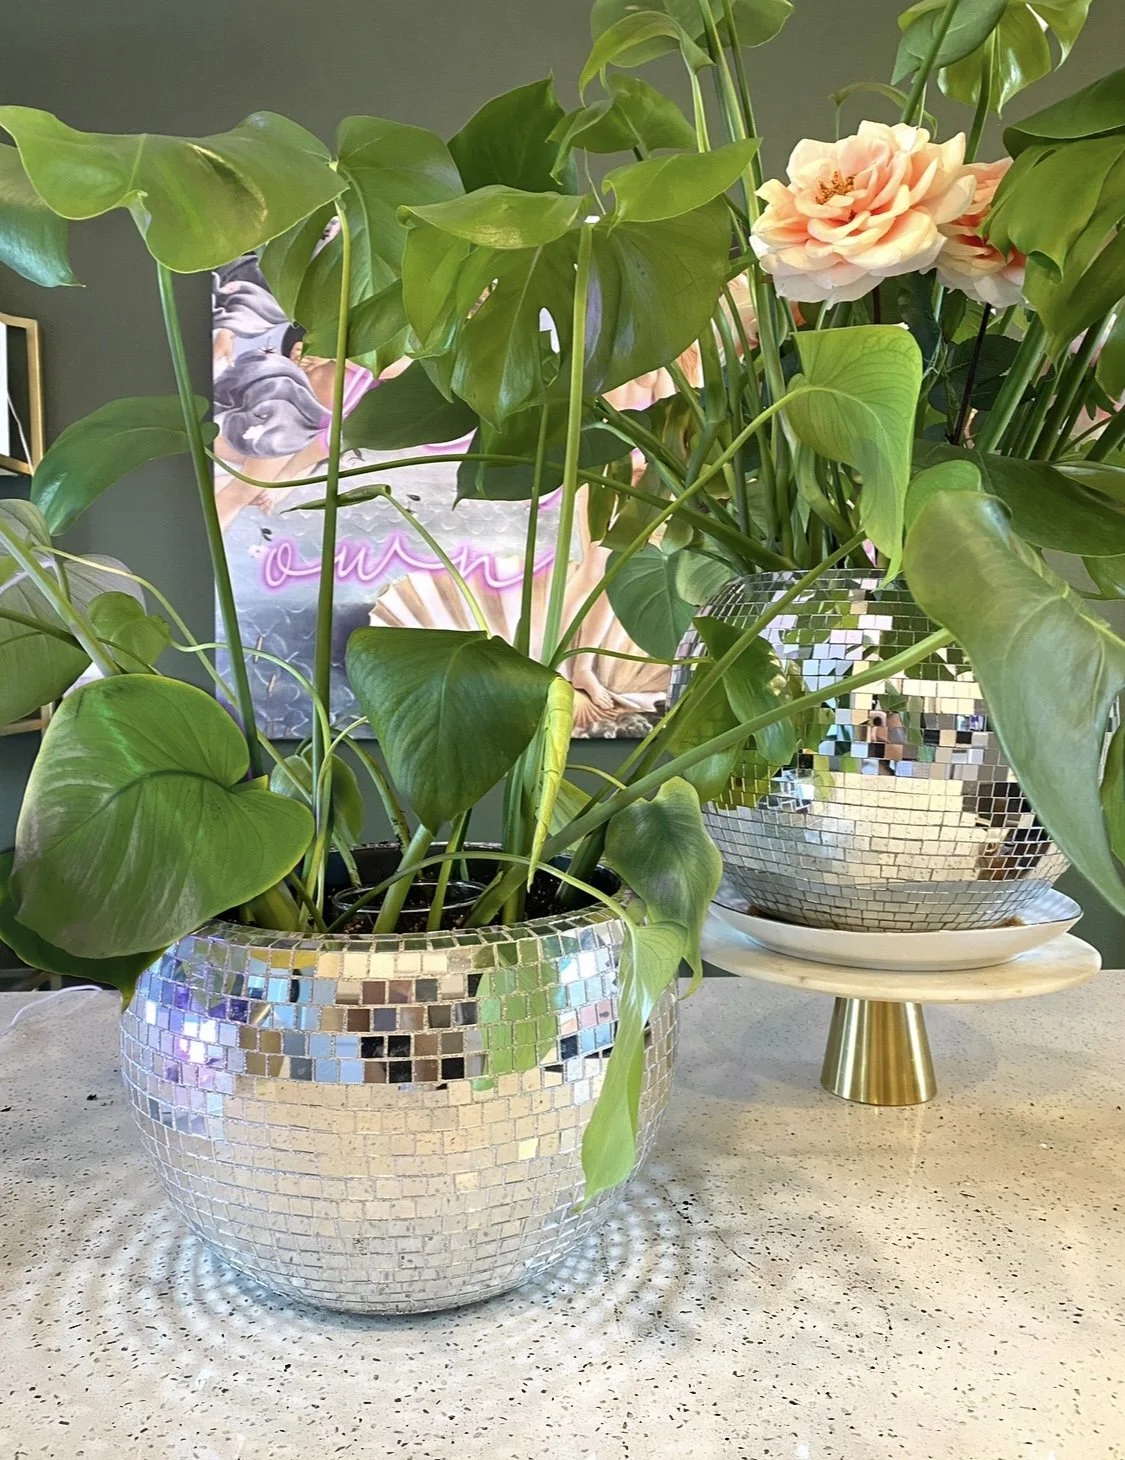
The first step to hanging a planter from the ceiling is selecting the right one. And I may or may not have a Disco addiction... I have disco’ed (yes I’ve made it a verb) everything from these planters to pill bottles to my chandelier haha. I have more of these hanging planters than anyone should, and I'm seriously debating selling them on Etsy. But I digress..

When selecting the perfect planters, just opt for a lightweight material that won't put too much strain on your ceiling. Consider materials like macramé, woven baskets, or lightweight ceramic.
Step 3b: Drywall anchors
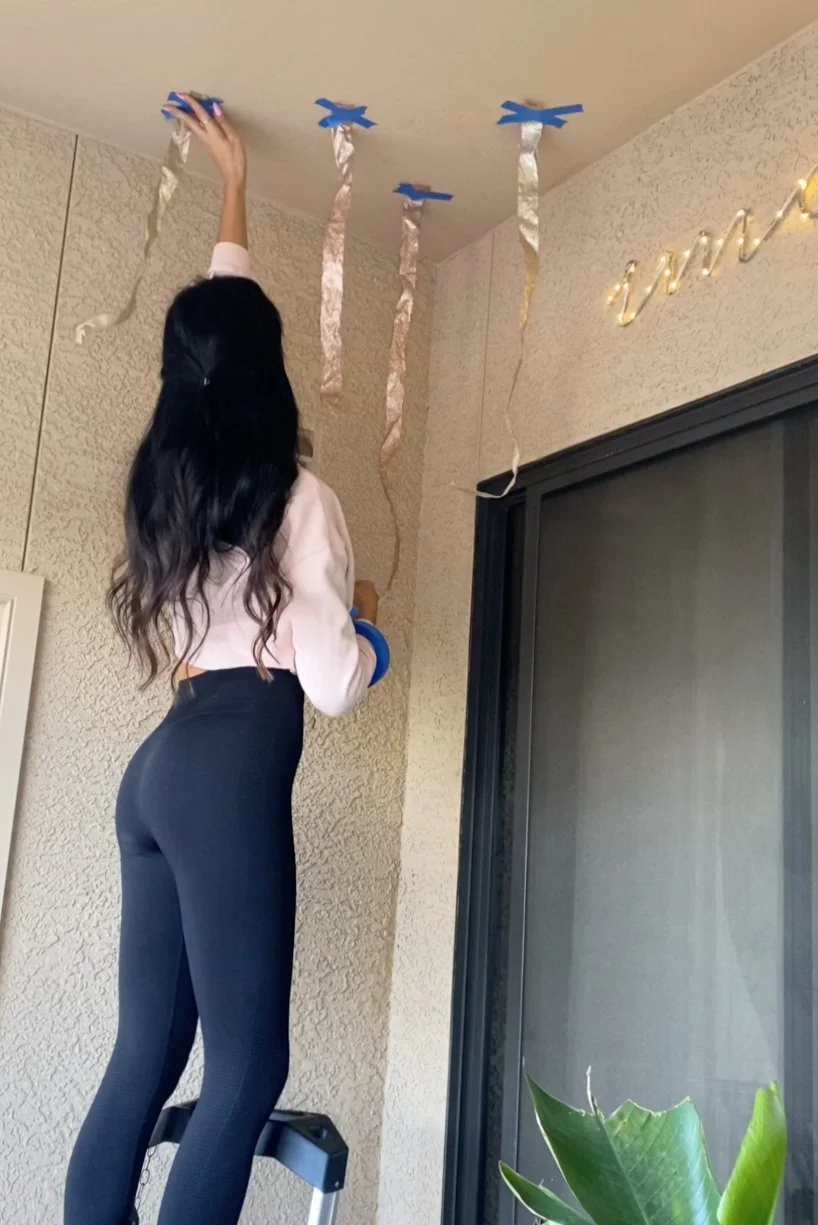
Step 2: Map out your space
I like to use a wide ribbon to visualize where I'm going to hang planters. Keep in mind the width of them and how long your foliage hangs. If you don’t have a giant corner space to work with, try staggering a couple so they don't compete for space.
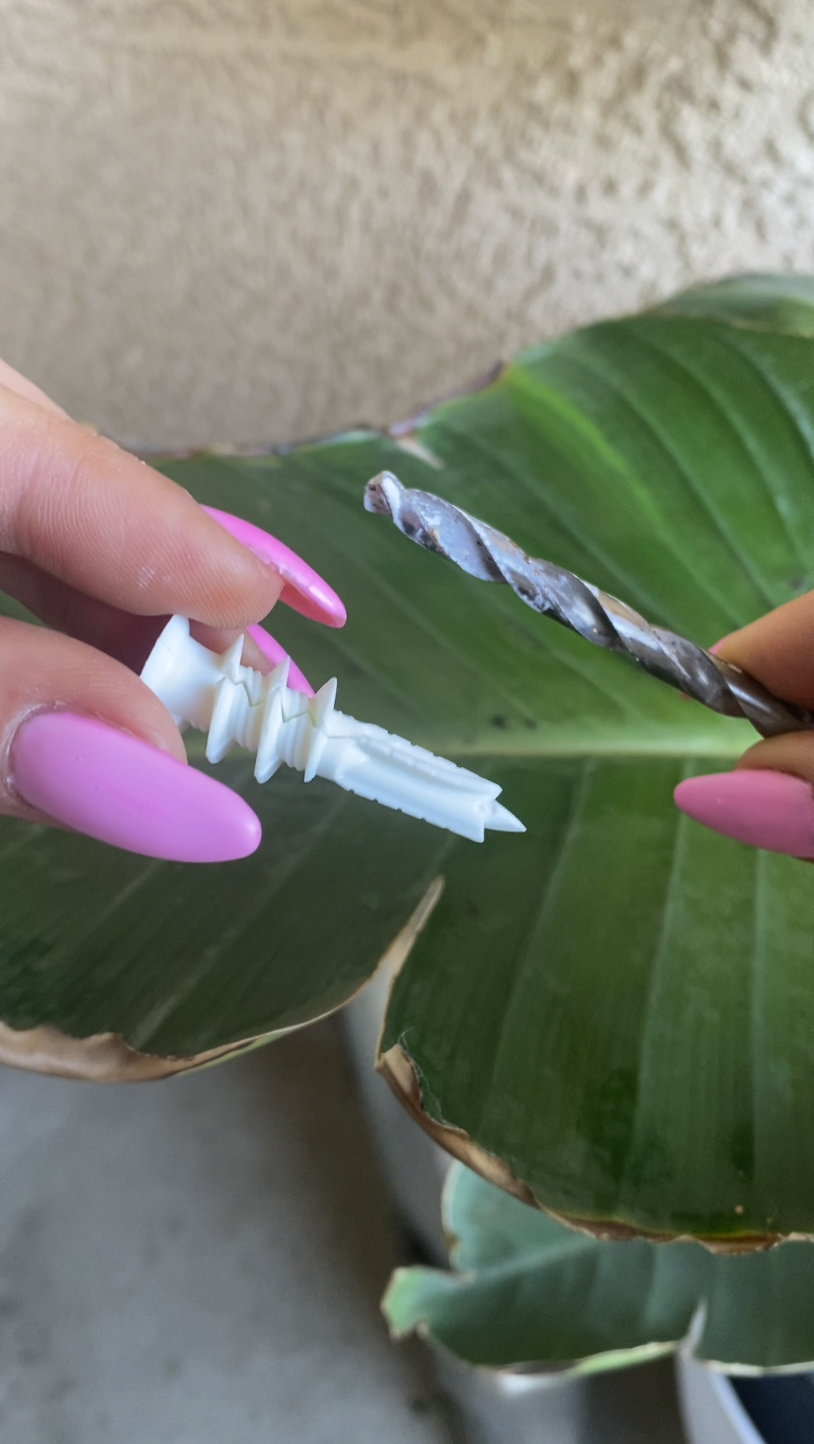
First you'll want to prepare the spot you want to hang from by creating a pilot hole. Use an appropriately sized drill bit (slightly smaller than the anchor base's diameter) to drill through the marked spot on the drywall. Insert the drywall anchor into the hole you created. Twist it clockwise until it feels snug against the drywall. For self-drilling anchors like this one, use a screwdriver or drill to drive the anchor into the drywall until it's flush.When hanging anything from the ceiling, the first thing you’ll want to do is find a stud. And if you find one, send him my way! Ha, kidding.. If yo dont have a studfinder, you can always pre-drill a tiny hole a size smaller than your screw and see if you hit a stud or drywall in the spot where yo uwant to hang. Finding a stud exactly where you want there to be one isn't always meant to be, but so is life… If you don't find one where you want the planter hung, don’t worry. Drywall anchors to the rescue!! Step 3a: Finding a stud


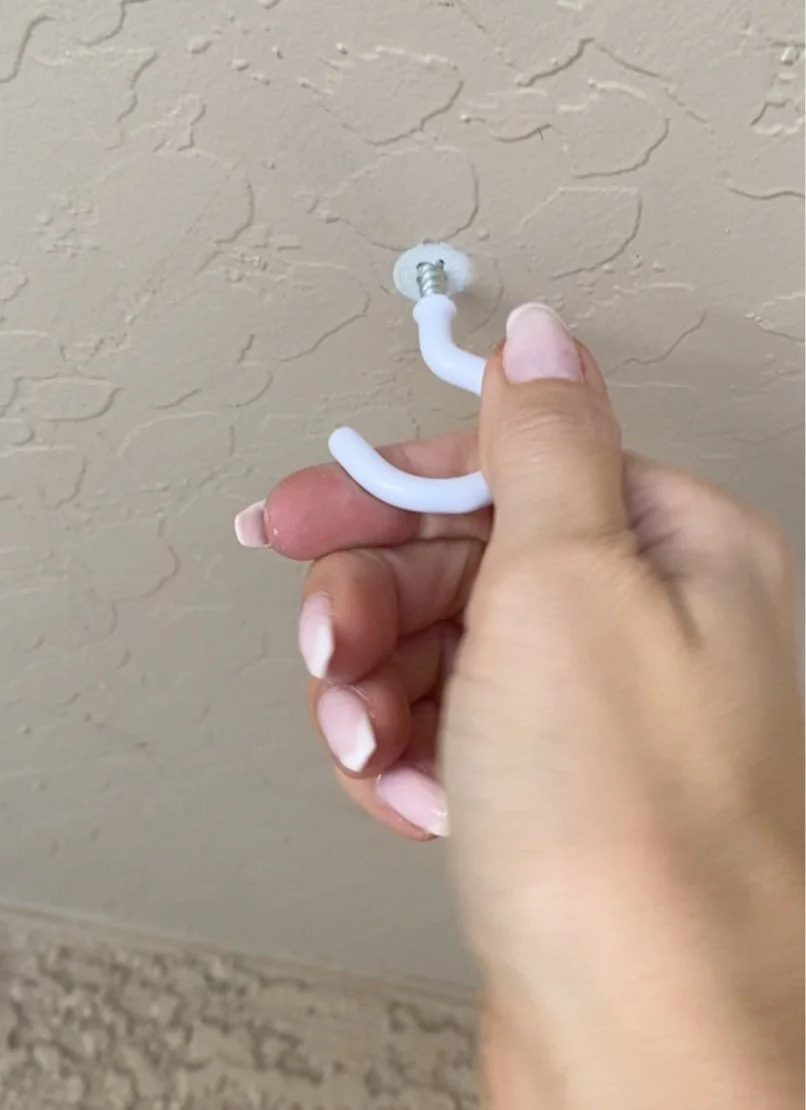
Most hanging planters will come with their own hooks, but if they don't, these are my favorites. I'll link them below. For a more seamless look, I painted them to match the ceiling so they blend in. Even if you're renting, your landlord should have exterior paint for you. I just asked my apartment's maintenance crew and brought an empty shampoo bottle they filled up for me. Surprisingly they didn't even ask me any questions as to why I needed exterior paint.Step 4: Hang with care
Embrace the Cascading Beauty:
Now, hang your planter from the hook or mount, stepping back to admire your newfound botanical masterpiece.

Once your hanging planter is in place, watch in awe as your leafy companion gracefully spills its green tendrils downward. Encourage its growth by occasionally rotating the planter for even sun exposure. And don't forget to shower your plant with compliments—plants respond well to positive reinforcement (probably).

Get The look


*Products linked are either the pieces used for this project or my recommended alternatives. Some may be affiliate links from which I earn a small commission.Green velvet dining chairs
Gold chandelier


Faux White Peonies
Gold Vase

Gold salt & Pepper shakers

DIY The look
half round wood Molding


Gorilla Glue
Gold Leaf spray paint

hand saw & Mitre Box

Marble Effect Spray
paint primer

Sherwin Williams paint
fine sand paper
pour on epoxy


rubber seal


pearl shimmer spray
Rowenta Steam Iron